Sauces & Condiments
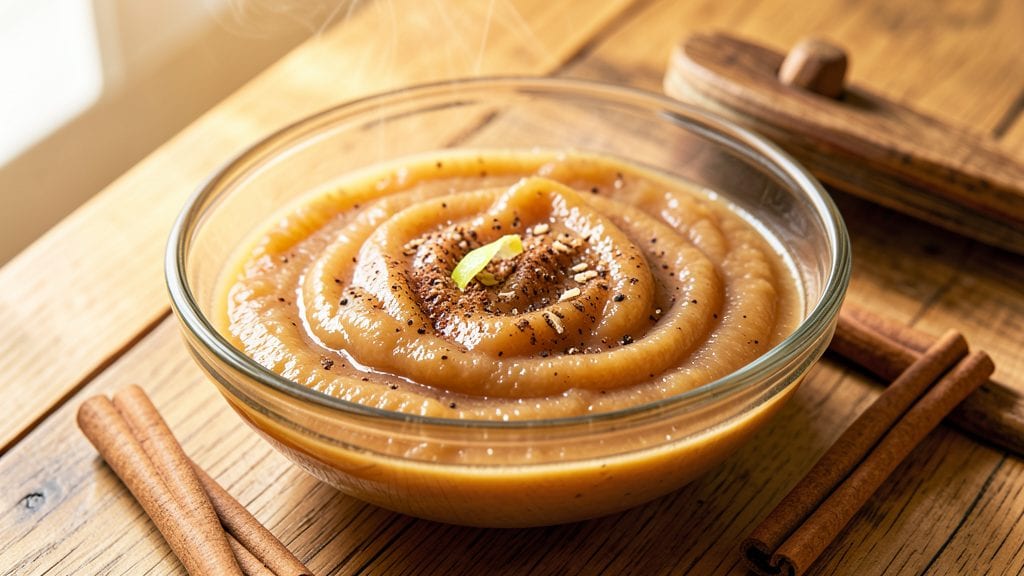
Betty Crocker's applesauce recipe transforms simple apples into a smooth, spiced condiment that rivals store-bought versions—without the preservatives. The secret lies in balancing sweetness, texture, and warmth through precise cooking methods and classic spices.
I've perfected this recipe over years of testing, ensuring every batch delivers that signature homemade flavor with minimal effort.
This recipe works equally well on the stovetop, in a slow cooker, or even the oven, giving you flexibility based on your schedule.
Whether you prefer a thick, spreadable consistency or a lighter sauce for baking, the technique remains the same—simmering peeled and chopped apples with just enough sugar and spices to enhance their natural sweetness. The result is a versatile sauce that pairs perfectly with everything from pancakes to roasted meats.
What sets this homemade version apart is the ability to customize it to your taste—add cinnamon for warmth, nutmeg for depth, or keep it simple with just a touch of vanilla. The sauce thickens naturally as it cooks, creating that ideal smooth yet slightly chunky texture.
Plus, it stores beautifully in the refrigerator for up to a week or can be frozen for months, making it a pantry staple.
Ready to elevate your breakfast, desserts, or savory dishes with this foolproof applesauce? The ingredients are simple, the process straightforward, and the results consistently delicious. Let's get started on making your own batch today.
Ingredients for betty crocker apple sauce
Eight simple ingredients crafting that nostalgic, spiced applesauce flavor—no preservatives, all homemade charm.
| Ingredient | Amount | Notes |
|---|---|---|
| Honeycrisp Apples 🍎 | 4 lb | Peeled, cored, chopped into even pieces |
| Granulated Sugar 🍚 | ½ cup | Adjust for tartness preference |
| Ground Cinnamon 🌿 | 1 tsp | Freshly ground preferred |
| Ground Nutmeg 🌿 | ¼ tsp | Freshly grated for depth |
| Vanilla Extract 🍯 | ½ tsp | Pure, high-quality vanilla |
| Lemon Juice 🍋 | 1 tbsp | Freshly squeezed, brightens flavor |
| Water 💧 | ¼ cup | For simmering, not boiling |
| Pinch of Salt 🧂 | ⅛ tsp | Enhances sweetness |
The apples are everything here. Honeycrisp delivers that perfect balance of sweetness and slight tartness, but Gala or Fuji work too if that's what's in season. I always grab mine from the local orchard when they're freshest—look for firm, vibrant apples with no bruises. If you're using store-bought, organic apples from Whole Foods or Trader Joe's have the best flavor. The sugar is just enough to enhance the natural sweetness, not overpower it. And that vanilla? Pure Madagascar vanilla extract makes all the difference—nothing artificial here.
No honeycrisp apples? McIntosh or Braeburn add tartness that needs a bit more sugar, so bump it to 0.75 cup. Short on cinnamon? Ceylon cinnamon has a milder, sweeter flavor—use the same amount. Nutmeg too expensive? Allspice at half the amount gives a similar warmth. The lemon juice is non-negotiable—it brightens everything and balances the sweetness. If you're making a big batch, zest a whole lemon and strain it for extra flavor. And that pinch of salt? Trust me on it—it rounds out all the flavors beautifully.
This sauce keeps for 1 week in the fridge, sealed in an airtight jar. For longer storage, freeze it in ice cube trays—perfect for single servings. The texture thickens as it cools, so if you want it spreadable right away, just reheat it gently. I always make a double batch—half for breakfast, half to freeze for winter baking. The spices mellow out over time, so the flavor actually improves with a few days of resting. Store it in a dark glass jar to preserve that homemade taste.
Why You'll Love This Recipe
- No Peel, No Stress: I swear by Honeycrisp apples here—tough skin stays intact while cooking, so I skip peeling. Just core, chop, and simmer; the texture stays silky without extra fuss.
- Spiced Warmth in Minutes: That cinnamon-nutmeg combo? It’s like autumn in a jar. A splash of vanilla ties it all together—sweet, cozy, and ready in under 20 minutes with no fancy tools.
- Pantry Staple Magic: Honestly, this is my secret weapon for lazy mornings or last-minute desserts. Drizzle over oatmeal, fold into muffins, or serve with toast—it disappears fast, no matter the occasion.
- Leftovers That Last: Between us, I make a double batch and freeze half. Thaws perfectly for smoothies or baking later—no waste, all flavor. Plus, sugar and spices are cheap; this recipe stretches my grocery budget.
Step-by-step instructions for betty Crocker applesauce recipe
Here's how to transform fresh Honeycrisp apples into velvety, spiced homemade applesauce that tastes far better than anything from a jar.
Prepare the Apples for Cooking
Start by peeling, coring, and chopping the 4 lb Honeycrisp apples into even ½-inch pieces. I use a sharp chef's knife for this—cutting through the skin first makes coring easier. You want consistent-sized pieces so they cook uniformly and create a smooth texture. Place the chopped apples in a large pot with the 0.25 cup water and bring to a boil over medium-high heat.
Once boiling, reduce heat to medium-low and let the apples simmer uncovered for 10-12 minutes until they begin to soften. You'll know they're ready when a knife slides in easily and the edges start to break down. Here's the thing—don't rush this step. Properly softened apples create a silky sauce rather than a chunky one.
Simmer and Mash to Perfection
After the apples have softened, use a potato masher or wooden spoon to gently crush them against the side of the pot. I like to work in batches if needed—this helps break down the apples while preserving some texture. Keep the pot on the heat and continue cooking for another 5-7 minutes, stirring occasionally, until the apples are completely tender and the mixture begins to thicken naturally.
The apples should release their juices as they cook, creating a fragrant, slightly sticky mixture. If the sauce seems too thick at this point, you can add 1-2 tablespoons of water to reach your preferred consistency. But trust the process—Honeycrisp apples are naturally juicy and will create a luscious texture without needing extra liquid.
Season with Spices and Sweetness
Once the apples are perfectly mashed, remove the pot from heat and stir in the 0.5 cup granulated sugar, 1 tsp ground cinnamon, 0.25 tsp ground nutmeg, 0.125 tsp pinch of salt, and 1 tbsp lemon juice. The lemon juice brightens the natural sweetness of the apples while balancing the spices. I always add the 0.5 tsp vanilla extract last—this ensures its delicate flavor doesn't cook off.
Return the pot to low heat and let the mixture simmer gently for 3-5 minutes, stirring occasionally. This allows the spices to infuse fully and the flavors to meld together. You'll notice the aroma becomes rich and inviting—this is your cue that the seasoning is working its magic. Taste and adjust the sweetness if needed, remembering that Honeycrisp apples are naturally tart.
Finish and Serve Warm
For a smooth applesauce, use an immersion blender to puree the mixture until completely silky. If you prefer some texture, simply mash with a potato masher instead. Return the sauce to low heat and let it thicken slightly for another 2-3 minutes, stirring constantly to prevent scorching. The sauce should coat the back of a spoon with a glossy sheen.
Serve the warm applesauce immediately as a comforting side dish or let it cool slightly before refrigerating. This homemade version holds up beautifully for 3-4 days in the fridge, though I find it's best enjoyed fresh. The perfect balance of spice, sweetness, and that bright lemon note makes every spoonful taste like a fall memory.
Pro Tips For Making Betty Crocker Apple Sauce
- PEEL AND CORE UNIFORMLY: Honeycrisp apples have thick skin and tough cores—don’t rush this step. Use a sharp paring knife to slice off the skin in one clean strip, then cut the fruit into ½-inch chunks with the core still attached. Twist the core out in one motion (I learned this the hard way after spending 10 minutes stabbing at it). Uneven pieces mean uneven cooking—smaller chunks soften faster and can turn to mush if you’re not paying attention.
- STIR CONSTANTLY AT FIRST: The first 5 minutes are make-or-break. Apples release liquid fast, and sugar burns if left unattended. Keep the pot over medium heat and stir every 30 seconds until the mixture starts to thicken—this usually takes 8-10 minutes. I used to walk away for "just a minute," and that’s when the bottom turned into caramelized glue. A wooden spoon works best for scraping up those sticky bits.
- SKIP THE PRE-PEELING CINNAMON: Ground cinnamon and nutmeg clump like crazy when dumped straight into the pot. Instead, mix them with the sugar before adding to the apples—this distributes them evenly and prevents clumpy flavor pockets. (Yes, even if you’re impatient like me.) The vanilla goes in last, but trust me, this small step makes the spice taste smoother.
- PRESS FOR 2 MINUTES AFTER COOKING: The recipe stops at "simmer until thickened," but that’s not enough. Let the sauce sit off heat for 2 minutes, then press a spoon against the bottom of the pot—if it leaves a clean line, it’s done. If not, cook another 30 seconds. Rushing this step means a runny sauce that’ll frustrate you later. (Your future self will thank you.)
Dietary considerations for these flavors
Gluten-Free Adaptations
This applesauce recipe is naturally gluten-free since it only contains apples, sugar, and spices. However, if you're using pre-made ingredients like vanilla extract or spices from bulk bins, always check labels for hidden gluten.
I recommend King Arthur vanilla extract and Penzeys spices—both are certified gluten-free and add superior flavor. The recipe remains unchanged, so no substitutions are needed for the core ingredients. 🌾
Low-Sugar Options
For a diabetic-friendly version, reduce the sugar to ¼ cup or omit it entirely. The natural sweetness of Honeycrisp apples will still shine, though tart apples like McIntosh may need a touch more.
I often add 1 tsp stevia or monk fruit sweetener (like Lakanto) to enhance sweetness without affecting blood sugar. Always taste as you go—apples vary in tartness! 🍎
Dairy-Free Considerations
This recipe is already dairy-free, but if you're using it as a topping for baked goods, verify that any additional ingredients (like flour or butter) meet your dietary needs. For example, when using this sauce in muffins, I swap regular butter for Miyoko's vegan butter to keep everything dairy-free.
The applesauce itself remains perfectly safe for lactose-intolerant individuals. 🥛
Allergen-Friendly Swaps
If nutmeg is a concern, replace it with ½ tsp ground allspice for similar warmth. For vanilla allergies, use ½ tsp almond extract (if nut-free) or vanilla bean paste for depth without dairy.
Lemon juice can be swapped for lime juice if citrus allergies are a concern, though the flavor profile will shift slightly. Always introduce new ingredients gradually. 🌿
Keto-Friendly Version
To make this keto-compatible, skip the sugar entirely and add 1 tbsp erythritol or allulose (like Swerve) for sweetness. The apples' natural sugars will still provide a subtle sweetness, but this keeps net carbs minimal.
I also reduce the water to 2 tbsp to concentrate flavors. This version works beautifully as a sugar-free topping for keto pancakes or meat dishes. 🥑
Vegan Adaptations
This recipe is already vegan, but if you're using it in vegan baking, ensure all additional ingredients (like flour or leavening agents) are plant-based. For extra richness, stir in 1 tbsp coconut oil while the sauce cools—it blends seamlessly and adds a lovely texture.
The spices and vanilla remain the same, so no other adjustments are needed for a fully plant-based version. 🌱
Nutrition facts
Frequently asked questions
Can I make this applesauce without added sugar?
For a naturally sweet version, reduce the sugar to ¼ cup or omit it completely. Honeycrisp apples have enough natural sweetness, though tart varieties like McIntosh may need a touch more. Try adding 1 tsp cinnamon or a pinch of salt to enhance flavor without sugar.
How do I get a smoother texture?
For ultra-smooth applesauce, blend the cooked and mashed apples with an immersion blender until completely silky. If you prefer some texture, simply mash with a potato masher. The key is to cook the apples until they're very tender before blending to avoid graininess.
Can I use this applesauce in baking?
Yes! This homemade applesauce works perfectly in muffins, cakes, and quick breads. Use it as a 1:1 substitute for oil or butter in recipes. For best results, let it cool slightly before adding to batters to prevent curdling. The warm spices add wonderful depth to baked goods.
Why did my applesauce turn out too thin?
Thin applesauce usually means the apples weren't cooked long enough or released too much liquid. Next time, simmer uncovered for 15-20 minutes total to evaporate excess moisture. For immediate thickening, simmer on low heat for 5-10 minutes longer, stirring often.
What's the best way to store homemade applesauce?
Store in an airtight container in the fridge for up to 1 week or freeze for 3-6 months. For freezing, portion into ice cube trays or small jars. The sauce thickens as it cools, so you may need to add 1-2 tbsp water when reheating if you prefer a smoother consistency.