Sauces & Condiments
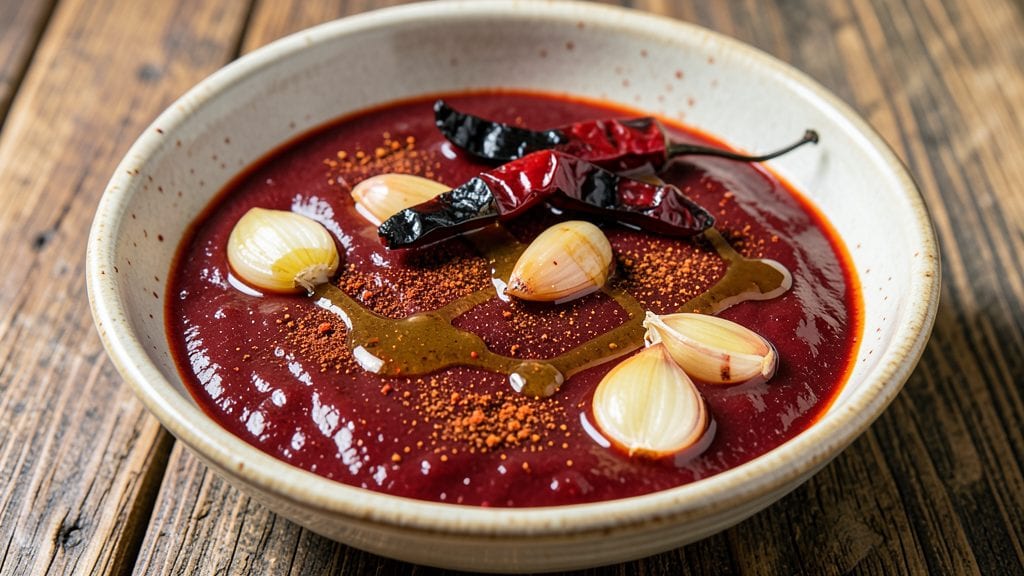
Mastering the Nandos sauce recipe at home unlocks that signature fiery, tangy punch that makes every bite unforgettable. This copycat recipe captures the bold flavors—smoky, citrusy, and packed with heat—that turn simple chicken into an addictive experience.
The secret lies in balancing fresh chili peppers, garlic, and vinegar with precise spice measurements to recreate that restaurant-quality kick.
What sets this sauce apart is its versatility—whether you're marinating wings, drizzling over fries, or using it as a dip, the flavor profile remains consistent.
The recipe uses accessible ingredients like red wine vinegar, smoked paprika, and a touch of honey to balance the heat, ensuring a well-rounded sauce every time.
With just 15 minutes of active prep and 30 minutes of simmering, you’ll have a batch ready to store in the fridge for up to two weeks.
The result is a vibrant, slightly thick sauce with a deep red hue and a heat level that builds gradually, leaving your taste buds tingling. The smoky undertones from the paprika and cayenne pair perfectly with the bright acidity of the vinegar, while the garlic adds a sharp, aromatic depth.
This isn’t just a copycat—it’s a sauce that rivals the original, with the added satisfaction of making it yourself.
Perfect for spicing up grilled meats, roasted vegetables, or even as a bold marinade, this Peri-Peri sauce transforms ordinary dishes into standout meals. Once you try it, you’ll never reach for store-bought again. Let’s get started on recreating that iconic flavor at home.
Ingredients for nandos sauce
Ten ingredients, one sauce that rivals Nandos’ iconic fiery kick—no shortcuts, just bold flavors.
| Ingredient | Amount | Notes |
|---|---|---|
| Fresh Red Chili Peppers 🌶️ | 4 whole | Jalapeño or serrano for heat |
| Red Wine Vinegar 🍷 | ½ cup | Bottled, not homemade |
| Smoked Paprika 🌶️ | 2 tbsp | High-quality, not pre-mixed |
| Garlic Cloves 🧄 | 6 cloves | Fresh, peeled, minced fine |
| Honey 🍯 | 2 tbsp | Light or clover variety |
| Cayenne Pepper 🔥 | 1 tsp | Adjust for desired heat |
| Ground Black Pepper 🌶️ | ½ tsp | Freshly ground preferred |
| Salt 🧂 | 1 tsp | Kosher or sea salt |
| Lemon Juice 🍋 | 2 tbsp | Freshly squeezed |
| Olive Oil 🫒 | 1 tbsp | Light, for thinning sauce |
The chili peppers are non-negotiable—jalapeños or serranos give that signature heat without overpowering. Grab them fresh from the produce section (not the jarred ones—they’re too mild). Trader Joe's or Whole Foods usually carry good ones, but any grocery store’s fresh bin works. For the vinegar, Bartles & Jaymes or Annie's red wine vinegar are solid choices, but any bottled version will do. The smoked paprika? Penzeys or the bulk bins at natural food stores have the best quality—avoid the pre-mixed spice blends, they’re usually watered down.
No fresh chilis? Red pepper flakes at double the amount work in a pinch, but the flavor won’t be as bright. Swap the honey for agave or maple syrup if you’re avoiding it, but honey’s slight floral note balances the heat perfectly. Running low on smoked paprika? Paprika plus a pinch of liquid smoke gets you close. The garlic should be fresh—pre-minced jars have no flavor. For the vinegar, white wine vinegar is a decent swap, but it’ll lack depth. And if you’re sensitive to heat, cut the cayenne to half a teaspoon—you can always add more later.
This sauce thickens as it cools, so thin with water or vinegar if it gets too stiff. Store in a glass jar in the fridge for up to 2 weeks, or freeze in ice cube trays for 3 months. The flavor actually improves after a day or two—let it sit overnight before using. And trust me, make a double batch. You’ll want it on everything.
Why You'll Love This Recipe
- Five-Ingredient Magic: I swear, this sauce is the kind of recipe you’ll make just to prove it’s that simple. Fresh chili peppers and garlic blitz in the food processor while you chop one onion—done. No simmering, no straining, no stress.
- Smoky-Sweet Heat: Between us, that smoked paprika and honey combo is chef’s kiss. The vinegar cuts through the richness, and the chili peppers add a slow-building heat that lingers—perfect for dipping, drizzling, or turning your chicken into a masterpiece.
- Weeknight Wingman: Honestly, this sauce is my go-to for lazy Tuesdays. Toss it with store-bought wings, roast some veggies, or even slather it on grilled fish—it works every time. (Yes, even when you’re too tired to plan.)
- Lasts All Week: I make a big batch and keep it in the fridge for days. The flavors deepen over time, and it’s cheaper than buying sauce by the bottle. Plus, a little goes a long way—drizzle, dip, or stir into soups. It’s the ultimate pantry stretch.
Step-by-step instructions for Nandos Peri-Peri sauce
This copycat recipe delivers that signature Nandos kick with a perfect balance of fire and tang.
Roast the Chili Peppers and Garlic
Preheat your oven to 425°F. Cut the 4 whole fresh red chili peppers in half lengthwise, remove the seeds and membranes (keep them if you want extra heat), and place them cut-side down on a baking sheet. Add the 6 cloves garlic, peeled and left whole, next to the peppers.
Roast for 15-20 minutes until the peppers are deeply charred and the garlic is golden brown. Watch closely after 10 minutes—you want them blackened but not burned. The charring develops that smoky depth that's key to the sauce. Let them cool slightly before handling, as they'll be very hot.
Blend the Roasted Ingredients
Transfer the roasted peppers and garlic to a blender or food processor. Add the 2 tablespoons smoked paprika, 1 teaspoon cayenne pepper, ½ teaspoon ground black pepper, and 1 teaspoon salt. Pulse until everything is finely chopped but not yet smooth.
This step builds the sauce's backbone. The smoked paprika adds that signature Nandos smokiness, while the cayenne delivers the heat. Don't skip blending these spices—they need to fully incorporate for even flavor distribution. If your blender struggles, add 1 tablespoon water to help it along.
Add Wet Ingredients and Blend Smooth
Pour in the ½ cup red wine vinegar, 2 tablespoons honey, and 2 tablespoons lemon juice. Add the 1 tablespoon olive oil and blend until completely smooth, scraping down the sides as needed. The sauce should be thin but well-emulsified, with no visible chunks.
Taste and adjust the seasoning—you might need more salt or cayenne depending on your heat preference. The vinegar and lemon juice brighten the sauce, while the honey balances the acidity. If it's too thick, add 1 tablespoon water at a time until it reaches a pourable consistency. This sauce should coat the back of a spoon but still flow freely.
Simmer and Thicken (Optional for Extra Depth)
Pour the blended sauce into a small saucepan and bring to a gentle simmer over medium-low heat. Let it cook for 5-7 minutes, stirring occasionally, until it thickens slightly and the flavors meld. You're looking for a slightly glossy finish—this isn't about reducing dramatically, just deepening the flavor.
If you're short on time, you can skip this step and use the sauce immediately. But simmering develops that restaurant-quality depth. Strain the sauce through a fine-mesh sieve if you prefer it completely smooth, or leave it slightly textured for extra authenticity. Let it cool completely before storing.
Pro Tips For Making Nandos Sauce
- CHAR THE PEPPERS RIGHT: Toss whole red chilis in a 400°F (200°C) oven for 8–10 minutes until their skins blister and blacken—this makes peeling them effortless. I used to char them on the stovetop, but the oven gives even, consistent heat without burning the edges. (Yes, even if you’re impatient like me, resist the urge to rush.)
- PEEL GARLIC LIKE A PRO: Smash each garlic clove with the flat side of your knife before mincing—this exposes more surface area and prevents clumping. I learned this the hard way after straining sauce through a fine sieve because garlic bits got stuck. A quick smash saves cleanup and keeps the texture smooth.
- SIMMER LOW AND SLOW: Reduce the sauce to a thick, glossy consistency over low heat—about 15–20 minutes—stirring occasionally. High heat turns it bitter, and that’s a flavor train wreck. I used to walk away, and the sauce would split or scorch. Now I babysit it, and the balance of sweet, smoky, and tangy stays perfect.
- SWEETEN WITH PRECISION: Add honey last, just before removing from heat, and taste as you go—start with 1 teaspoon, then adjust. Too much honey upfront masks the vinegar’s acidity, and you’ll end up with syrup. I was skeptical until I tried it; now I measure in ½-teaspoon increments. (Your future self will thank you.)
Perfect pairings for these flavors
Spicy Dips
This sauce transforms into an irresistible dip when served with crudités or pita chips. I love pairing it with cucumber slices, bell pepper strips, and carrot sticks for a refreshing contrast to the heat.
For extra indulgence, serve with warm naan bread or plantain chips—the smoky, tangy flavors cut through the richness beautifully. 🌶️
Marinade Magic
Use this sauce as a marinade for grilled chicken, shrimp, or tofu—it adds that signature Peri-Peri flavor while keeping the meat juicy. I marinate bone-in chicken thighs for at least 4 hours (overnight is best) before grilling.
For seafood, 15-20 minutes is enough to infuse the flavor without overpowering. Always pat the protein dry before marinating to help the sauce cling.
Sauce for Fries
Take your fries to the next level by drizzling this sauce over crispy sweet potato fries or classic potato wedges. I like to toss them in a mix of olive oil, salt, and smoked paprika before baking, then finish with a generous pour of the sauce.
For extra decadence, sprinkle with crumbled feta or shredded parmesan—the salty cheese balances the heat perfectly.
BBQ Glaze
Reduce this sauce by half on the stovetop to create a sticky, smoky glaze for ribs, brisket, or pork chops. Simmer it uncovered over medium heat for 10-15 minutes, stirring occasionally, until it thickens to a syrupy consistency.
Brush it on during the last 5 minutes of grilling or baking for a caramelized finish. This glaze pairs especially well with pulled pork sandwiches or grilled sausages.
Salad Dressing
Thin this sauce with equal parts water or apple cider vinegar to create a bold, spicy salad dressing. I toss it with mixed greens, avocado slices, and cherry tomatoes for a refreshing, heat-packed salad.
For extra richness, whisk in 1 tablespoon olive oil before serving. It’s a game-changer for kale salads or grilled vegetable bowls.
Breakfast Twist
Add a drizzle of this sauce to scrambled eggs, breakfast burritos, or avocado toast for a spicy kick. I love mixing it into sour cream or Greek yogurt for a Peri-Peri dip to serve with hash browns or breakfast tacos.
The tangy, smoky flavors wake up your taste buds and make breakfast feel like a full meal. 🍳
Nutrition facts
Frequently asked questions
Why does Nandos sauce need roasted chili peppers?
Roasting the chili peppers develops a deep, smoky flavor that's essential to authentic Peri-Peri sauce. The charring process caramelizes natural sugars in the peppers, creating complex layers of flavor that can't be replicated with raw peppers or powdered spices. This smoky depth is what makes the restaurant version so distinctive.
Can I make this sauce without fresh chili peppers?
Yes, but the flavor won't be as authentic. Use red pepper flakes doubled (4 tsp) or 1-2 dried ancho chilis soaked in warm water for 20 minutes. For heat, add an extra ½ tsp cayenne pepper. However, fresh peppers give the best balance of heat and smokiness that's hard to replicate with dried alternatives.
How do I adjust the heat level?
Start with the full 1 tsp cayenne pepper for medium heat. For milder sauce, reduce to ½ tsp or omit completely. If you want extra spice, add ½ tsp more cayenne or 1 tsp chili powder after blending. Remember, you can always add more heat later, but you can't remove it once it's mixed in.
What's the best way to store homemade Peri-Peri sauce?
Store in a clean glass jar in the fridge for up to 2 weeks. For longer storage, freeze in ice cube trays or small jars for up to 3 months. The sauce actually tastes better after 24 hours as flavors meld together. If it thickens in the fridge, thin with water or vinegar before using.
Can I use this sauce as a marinade?
This sauce makes an excellent marinade for chicken, shrimp, or tofu. For meat, marinate for 4-12 hours (longer for tougher cuts). For seafood, use it for 15-20 minutes max to avoid overpowering delicate flavors. Always pat proteins dry before marinating to help the sauce cling better during cooking.