Desserts
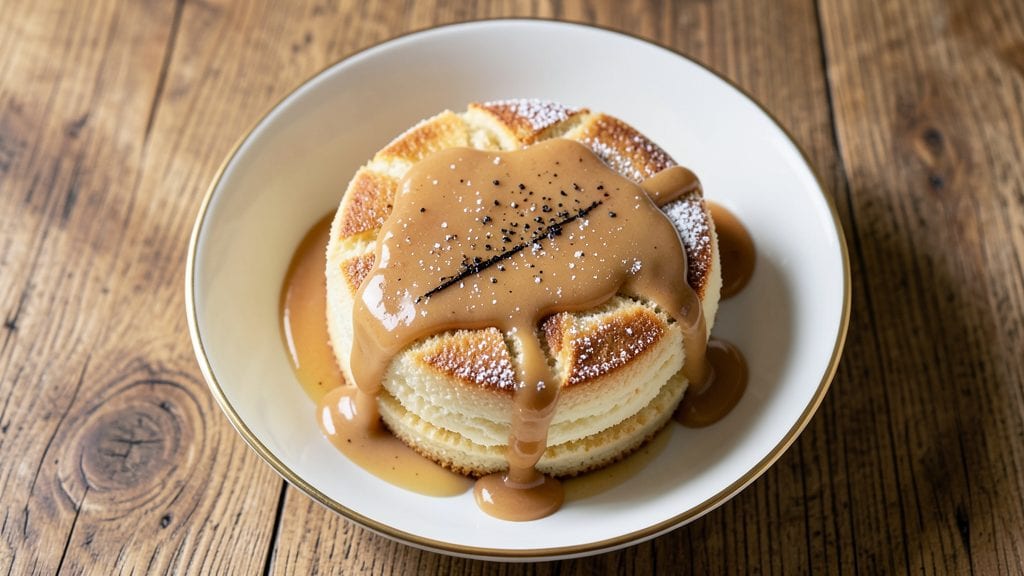
This classic vanilla butter cake with buttermilk sauce delivers the perfect balance of tender crumb and tangy cream that defines timeless desserts. The secret lies in a precise method that ensures moist layers and a buttermilk sauce so rich it transforms ordinary cake into something extraordinary.
I've perfected this recipe over years of baking, and it never fails to impress—whether for special occasions or simple indulgence.
The cake itself is simple yet foolproof, requiring just basic pantry staples and a 350°F oven. The buttermilk sauce elevates it further, adding a velvety contrast that cuts through the cake's sweetness beautifully.
What makes this recipe special is how the sauce's tangy depth complements the vanilla's warmth, creating a harmonious bite every time.
By the time you serve this dessert, you'll have golden layers of cake perfectly complemented by a smooth, creamy sauce that's impossible to resist. The combination is elegant yet approachable, making it ideal for both formal gatherings and casual family dinners.
Each forkful delivers that perfect marriage of textures and flavors.
Serve this classic dessert with fresh berries or a sprinkle of powdered sugar for added flair. The recipe scales easily, so you can make it for a crowd or just a few slices to enjoy with coffee. Let's create this timeless treat together—it's a recipe that truly delivers on tradition.
Ingredients for classic vanilla butter cake with buttermilk sauce
Basic pantry staples transform into timeless vanilla cake with velvety buttermilk sauce.
| Ingredient | Amount | Notes |
|---|---|---|
| All-Purpose Flour 🌾 | 2 ½ cups | Sifted for even texture |
| Unsalted Butter 🧈 | 1 cup | Room temperature, full-fat preferred |
| Granulated Sugar 🍚 | 1 ½ cups | White sugar for classic sweetness |
| Vanilla Extract 🌸 | 2 tsp | Pure vanilla extract preferred |
| Large Eggs 🥚 | 3 whole | Room temperature for even mixing |
| Buttermilk 🥛 | 1 cup | Fresh or homemade blend |
| Baking Powder 🧂 | 2 tsp | Aluminum-free for best results |
| Salt 🧂 | ½ tsp | Fine sea salt preferred |
| Vanilla Bean 🌸 | 1 whole | Seeds scraped for extra flavor |
| Heavy Whipping Cream 🥛 | 1 ½ cups | Cold for sauce consistency |
| Powdered Sugar 🍚 | 1 ½ cups | For sauce sweetness |
| Lemon Juice 🍋 | 1 tbsp | Freshly squeezed for tang |
The butter and flour are the foundation—use high-quality unsalted butter (like Land O'Lakes or Plugrá) for richness, and sift the flour to avoid dense layers. Vanilla matters here: pure extract (not imitation) and a whole vanilla bean add depth. For the buttermilk, fresh is best, but a quick homemade blend of milk and vinegar works in a pinch. King Arthur flour or Gold Medal are reliable choices for the flour, as they provide consistent results. Store butter in the fridge until ready to use, and let it sit at room temperature for about 30 minutes before creaming.
No buttermilk? Mix 1 cup milk with 1 tbsp vinegar or lemon juice, let sit 5 minutes. Substitute powdered sugar with equal parts granulated sugar if needed, though texture may differ slightly. For a richer sauce, add 1 tsp vanilla bean paste to the cream mixture. The vanilla bean seeds can be scraped and mixed into the cake batter for an extra layer of flavor. If you're short on time, use a high-quality vanilla sugar (like McCormick) in place of fresh vanilla, though fresh is always superior. The heavy whipping cream should be cold when whipping to achieve the perfect consistency for the sauce.
Store cake layers wrapped in plastic at room temperature for up to 3 days or in the fridge for 5 days. The sauce keeps well in the fridge for 4-5 days—just whisk before serving. For longer storage, freeze cake layers separately for up to 3 months and thaw at room temperature. The sauce can be frozen for 2 months, but it may separate slightly upon thawing. Rewhip briefly to restore smoothness. To serve, layer cake with sauce between and on top, then dust with powdered sugar for an elegant finish.
Why You'll Love This Recipe
- No-Fuss Mixing: I swear by this recipe because it’s one bowl, no fuss. Cream butter and sugar until light—that’s the magic—then fold in eggs and vanilla. The buttermilk sauce? Just whisk powdered sugar into warm buttermilk while the cake bakes. Five minutes of active work, and you’re golden.
- Buttery Vanilla Bliss: That first bite—soft, tender crumb with layers of vanilla that sing? The buttercream frosting isn’t just sweet; it’s rich, thanks to the real butter in the cake. The buttermilk sauce cuts through the richness like a cool sip of milk on a hot day. Honestly, it’s the kind of cake that makes you pause mid-bite.
- Weeknight Hero: This feeds a crowd but costs less than takeout. The cake keeps well for days (if it lasts that long), and the buttermilk sauce? I make it ahead and stash it in the fridge. Perfect for birthdays, potlucks, or when you need dessert but don’t want to slave over it. (Yes, even on a Tuesday night.)
- Budget-Friendly Luxury: Flour, butter, sugar—ingredients you already own. No fancy add-ins, no specialty tools. The buttermilk sauce uses pantry staples, and the cake’s simplicity means no wasted ingredients. It’s the kind of recipe that proves you don’t need Pinterest-perfect to make something ridiculously good.
Step-by-step instructions for classic vanilla butter cake with buttermilk sauce
Master this timeless dessert with a moist vanilla cake layered with tangy buttermilk cream.
Prepare the Cake Batter
Preheat your oven to 350°F and grease two 9-inch round cake pans, lining the bottoms with parchment paper. In a medium bowl, whisk together the 2.5 cups all-purpose flour, 2 teaspoons baking powder, and 0.5 teaspoon salt. Set aside—this is your dry mix.
In a large mixing bowl, cream the 1 cup unsalted butter and 1.5 cups granulated sugar together on medium speed until light and fluffy, about 3-5 minutes. This step is crucial for a tender crumb. Add the 3 whole large eggs, one at a time, mixing well after each addition. Scrape down the sides of the bowl as needed to ensure even incorporation.
Split the 1 cup buttermilk in half, alternating with the 2 teaspoons vanilla extract (plus the seeds from the 1 whole vanilla bean). Begin and end with the buttermilk to prevent curdling. Gradually add the dry mix to the wet ingredients, mixing on low speed just until combined—overmixing develops gluten and makes the cake dense. The batter should be smooth and slightly thick.
Bake the Cake Layers
Divide the batter evenly between the prepared cake pans, smoothing the tops with a spatula. Bake for 25-30 minutes, or until a toothpick inserted into the center comes out clean. Rotate the pans halfway through baking for even browning. Let the cakes cool in their pans for 10 minutes, then transfer to a wire rack to cool completely. This cooling step prevents crumbling when layering.
While the cakes cool, scrape the seeds from the remaining 1 whole vanilla bean (if any were left) and set aside for the sauce. The cakes should have a golden dome with a fine, even crumb—no dense or gummy spots. If the tops brown too quickly, tent the pans loosely with foil after 15 minutes to prevent overbrowning.
Make the Buttermilk Sauce
In a medium saucepan, combine the 1.5 cups heavy whipping cream, 1.5 cups powdered sugar, and 1 tablespoon lemon juice. Warm the mixture over medium heat, stirring constantly, until the sugar dissolves completely and the cream reaches 160°F. Remove from heat and stir in the vanilla bean seeds and any reserved vanilla extract from the cake batter. Let the sauce cool to room temperature—this ensures a smooth, glossy finish.
The sauce should thicken slightly as it cools, achieving a velvety consistency perfect for layering. If it’s too thick, whisk in 1 teaspoon hot water to loosen. The tangy lemon and vanilla complement the cake’s sweetness, creating a balanced flavor profile. Taste and adjust sweetness if needed—some prefer a touch more powdered sugar for a sweeter contrast.
Assemble and Layer the Cake
Place one cake layer on a serving plate. Spread an even layer of the buttermilk sauce over the top, leaving a ½-inch border around the edges. Repeat with the second cake layer. For a polished look, dust the top and sides of the cake with a thin layer of powdered sugar using a fine-mesh sieve. Chill the cake in the refrigerator for at least 2 hours before serving to allow the layers to set.
Slice the cake into 8 even wedges using a serrated knife dipped in hot water and wiped clean between cuts. The layers should hold together neatly, with a moist crumb and a glossy, tangy sauce peeking through. Serve at room temperature for the best texture—this classic combination of vanilla and buttermilk is pure comfort in every bite.
Pro Tips For Making Classic Vanilla Butter Cake With Buttermilk Sauce
- Cream Butter Cold: DESCRIPTION: Take that butter straight from the fridge—no softening needed. I used to melt it into the sugar like a lazy person, but cold butter creates tiny pockets of air in the batter, giving you that signature tender crumb. Just cut it into small cubes and let the heat do the work.
- Whisk Eggs First: DESCRIPTION: Beat those eggs until they’re pale and thick before adding them to the dry ingredients. I learned this after a cake turned out dense—turns out, eggs with body incorporate better and keep the crumb light. No need to overdo it, just until you see ribbons when you lift the whisk.
- Don’t Overmix: DESCRIPTION: Stop mixing the moment the flour disappears. I used to think more mixing meant better gluten development, but this cake thrives on tenderness. Once the batter looks shaggy but just combined, call it done—overworking it turns your cake into a chewy brick.
- Buttermilk Sauce Shortcut: DESCRIPTION: Skip the stovetop fuss: microwave the buttermilk, sugar, and a splash of vanilla for 30 seconds, then whisk until smooth. It’s not traditional, but it’s foolproof and saves you from burning the sauce. Taste it—if it’s too thin, add a cornstarch slurry. Done.
Essential equipment for this dish
Cake Pan Essentials
For this recipe, you’ll need two 9-inch round cake pans—preferably with removable bottoms for easy release. I recommend Wilton Perfect Results Non-Stick Cake Pans because they release cleanly without sticking, even with buttery batters.
If you don’t have non-stick pans, use lightly greased standard pans with parchment paper liners for foolproof results. Avoid dark-colored pans—they can cause uneven baking and overbrowning. 🧈
Mixing Tools Matter
A stand mixer with a paddle attachment is ideal for creaming butter and sugar to perfection, but a hand mixer works too if you’re patient. I’ve used my KitchenAid Artisan Series for years—it’s durable and handles dense batters like this one without overheating.
For whisking dry ingredients, a medium-sized wire whisk ensures even distribution of baking powder and salt. Don’t skip sifting the flour; a fine-mesh sifter or handheld sifter prevents lumps that can lead to uneven texture.
Precision Measuring
Accurate measurements are non-negotiable for this cake. Invest in a stainless steel measuring cups set (like OXO Good Grips) for dry ingredients and a liquid measuring pitcher with clear markings for buttermilk and cream.
For the vanilla bean, use a small paring knife to scrape seeds—every speck adds depth. A digital kitchen scale is optional but helpful if you prefer grams over cups, especially for baking powder and salt where precision matters most. 🌸
Baking Tools for Success
A toothpick is your best friend for testing doneness—insert it into the center and check for clean results. For cooling, a wire cooling rack prevents soggy bottoms, and I always keep one nearby. To prevent overbrowning, grab a small sheet of aluminum foil to tent the pans if needed.
A spatula (like OXO Good Grips) helps smooth batter evenly, and a serrated knife (such as Mercer Culinary Genesis) ensures clean slices when serving. Don’t forget a fine-mesh sieve for dusting powdered sugar—it creates a professional, even finish.
Sauce-Making Gear
The buttermilk sauce requires a medium saucepan with even heat distribution—I love my All-Clad Stainless Steel for this. A wooden spoon or heat-resistant silicone spatula prevents scorching while stirring. For cooling, a small bowl placed in an ice bath speeds up the process if you’re short on time.
A thermometer (like Thermoworks Thermapen) ensures the cream reaches 160°F without guessing. Whisking the cooled sauce smooth? A balloon whisk or French whisk works best for aerating without incorporating air bubbles. 🍋
Assembly and Serving
Layering the cake requires a level surface—use a large serving plate or cake stand to keep things stable. A small offset spatula helps spread sauce evenly, and a fine-mesh sieve dusts powdered sugar like a pro. For chilling, a large cooler or refrigerator shelf works, but avoid stacking plates.
To slice perfectly, dip your serrated knife in hot water, wipe clean, and cut through the center for even portions. A damp towel under the plate prevents slipping while slicing. ✨
Nutrition facts
Frequently asked questions
Why does this vanilla butter cake need buttermilk?
The buttermilk adds a subtle tang that balances the cake's sweetness while keeping it moist. It also reacts with baking powder to create air pockets for a lighter texture. For the sauce, it adds depth that complements the vanilla perfectly. The tangy flavor prevents the dessert from tasting too heavy.
Can I make this cake without a stand mixer?
Use a hand mixer or even whisk by hand for 3-5 minutes to cream butter and sugar properly. The key is patience—keep mixing until the mixture is light and fluffy. For the sauce, a whisk works just as well as a mixer. A little extra elbow grease ensures the same tender crumb.
How do I fix a cake that's too dense?
Overmixing develops gluten, making cakes dense. To prevent this, mix wet and dry ingredients just until combined. If your cake turns out dense, try reducing flour by 1-2 tablespoons next time or increasing leavening (baking powder) slightly. Also ensure butter is room temperature and eggs are at room temp for even mixing.
Can I substitute buttermilk in the sauce?
Yes, replace buttermilk with equal parts milk and 1 tbsp vinegar or lemon juice (let sit 5 minutes). For a richer sauce, use heavy cream instead of milk. The tang from lemon juice remains essential—it balances the sweetness. If you omit it entirely, the sauce may taste too sweet.
How long can I store the cake layers before assembling?
Wrap cooled cake layers tightly in plastic wrap and store at room temperature for up to 3 days or refrigerate for 5 days. The sauce keeps well in the fridge for 4-5 days—just whisk before using. For longer storage, freeze layers separately for 3 months and sauce for 2 months. Thaw at room temperature before assembling.