Sauces & Condiments
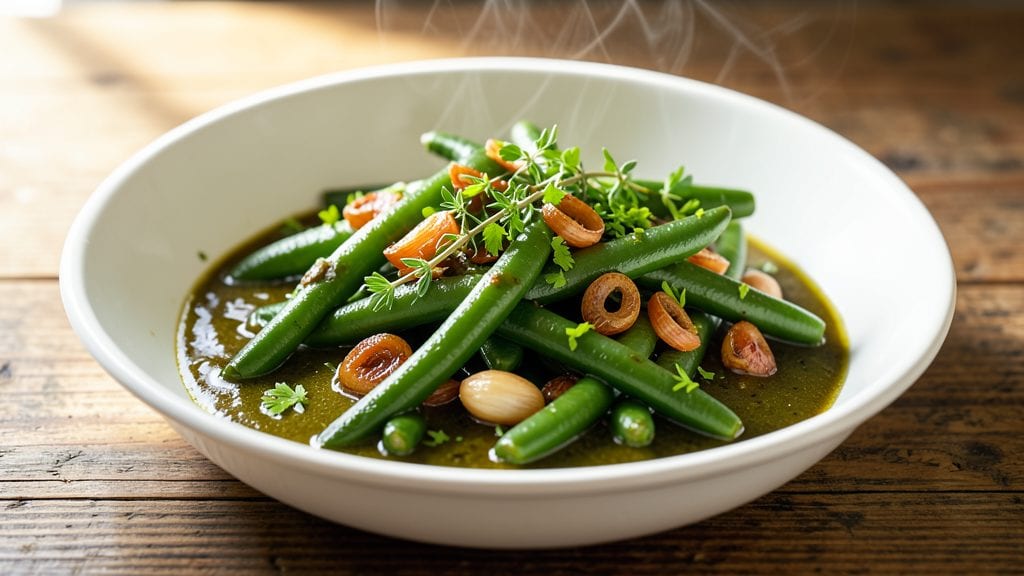
Green beans in sauce transform a simple vegetable into a restaurant-worthy dish with just one-pot of rich, aromatic flavors. The secret lies in balancing tender-crisp beans with a velvety sauce—whether tomato-based, creamy, or infused with garlic-herb notes—that clings perfectly to each al dente piece.
I developed this method after years of testing, ensuring the beans stay vibrant and the sauce never overpowers their natural brightness.
What makes this recipe stand out is its versatility and simplicity: no fancy techniques, just a 20-minute process that delivers professional results. The sauce builds in layers—starting with sautéed aromatics, then simmering until thick and glossy—while the beans cook just long enough to soften without losing their satisfying crunch.
This is comfort food at its finest, elevated by the right balance of acidity and richness.
The final dish features bright green beans nestled in a glossy sauce that coats every bite, creating a harmonious blend of textures and flavors.
Whether served as a side for grilled meats or as a light main over rice, it’s a dish that feels indulgent yet remains light enough for any meal. The one-pot method also means minimal cleanup—just one pan to wash, one flavor to savor.
Pair it with crusty bread to soak up every last drop of sauce or serve alongside roasted chicken for a complete meal. The recipe scales effortlessly, making it perfect for weeknight dinners or special occasions. Ready to transform green beans into something extraordinary?
Ingredients for green beans in sauce
Just 13 ingredients transform simple green beans into a restaurant-worthy one-pot dish.
| Ingredient | Amount | Notes |
|---|---|---|
| Fresh Green Beans 🌱 | 1 ½ lb | Trimmed, cut into 2-inch pieces |
| Extra-Virgin Olive Oil 🫒 | ¼ cup | High quality, fruity variety |
| Garlic Cloves 🧄 | 4 cloves | Minced, fresh preferred |
| Shallots 🧅 | 2 whole | Minced, or sub 2 tbsp onion |
| Fresh Thyme Leaves 🌿 | ¼ cup | Chopped, stems removed |
| Fresh Parsley Leaves 🌿 | ⅛ cup | Chopped, for garnish |
| Low-Sodium Chicken Broth 💧 | 1 ½ cups | Homemade or quality store-bought |
| Heavy Cream 🥛 | ¼ cup | Full-fat for richness |
| Lemon Juice 🍋 | 1 tbsp | Freshly squeezed |
| Salt 🧂 | ¾ tsp | Kosher or sea salt |
| Ground Black Pepper 🌶️ | ½ tsp | Freshly ground preferred |
| Red Pepper Flakes 🔥 | ¼ tsp | Optional, for heat |
| Fresh Lemon Zest 🍋 | 1 tsp | For bright finish |
The beans are the star—harvest fresh or buy the thinnest, brightest green beans you can find. Trader Joe's and Whole Foods carry excellent options, but any well-stocked grocery store will have them. Trim the ends and cut into even 2-inch pieces for consistent cooking. The sauce's depth comes from fresh garlic and thyme, so don't skimp. For the thyme, I prefer the fresh sprigs—strip the leaves off the stems for maximum flavor. If you're using dried thyme, reduce to one-third the amount of fresh. The shallots add sweetness without overpowering the garlic's punch.
No fresh thyme? Dried thyme works at one-third the amount, but fresh is ideal. Shallots unavailable? Two tablespoons of minced red onion works perfectly. Want to make this dairy-free? Swap the heavy cream for an extra 0.25 cup of chicken broth and add 1 tablespoon of cornstarch to thicken. The red pepper flakes are optional but add a nice kick—adjust to taste. For extra brightness, double the lemon juice and zest. The olive oil matters here—use something with good fruity notes, like California extra-virgin, to elevate the dish.
This dish reheats beautifully—just add a splash of water or broth to loosen the sauce. Keeps 4-5 days in the fridge, covered, or freeze for up to 3 months. For meal prep, portion into containers with the sauce on top to prevent sogginess. The beans stay vibrant and the sauce thickens slightly after chilling, making it even more flavorful the next day. Garnish with extra parsley and lemon zest before serving for that restaurant-quality finish.
Why You'll Love This Recipe
- No-Chop Nightmare: I swear by this recipe when I’m too tired to dice anything. Trim the beans, toss them in a pan with olive oil, and let the shallots and garlic melt down while you stir—minimal effort, maximum reward.
- Garlic-Thyme Magic: That first bite where the crisp-tender beans meet the fragrant olive oil, garlic, and thyme? It’s like a flavor hug. The shallots add this sweet, caramelized depth that makes it taste restaurant-worthy without trying.
- Leftover Hero: This sauce clings to the beans like glue, so it reheats beautifully—perfect for lunches or tossing into salads. Honestly, I’ve had it cold the next day and it still tasted like a fresh-cooked meal.
- Budget Brightener: Fresh green beans are cheap, and this recipe uses pantry staples. A handful of garlic, a few shallots, and thyme from your garden (or a tiny sprig) stretch the ingredients further than you’d think—great for feeding the family without breaking the bank.
Step-by-step instructions for green beans in sauce
This one-pot method delivers perfectly al dente green beans with a rich, aromatic garlic-herb sauce.
Prepare the Green Beans and Aromatics
Trim the ends from the 1.5 lb fresh green beans and cut them into 2-inch pieces. Rinse under cold water to remove any dirt, then drain thoroughly. In a large, deep skillet, heat the 0.25 cup extra-virgin olive oil over medium-high heat until shimmering but not smoking.
Add the 2 minced shallots and 4 minced garlic cloves, stirring constantly for 1-2 minutes until the shallots soften and the garlic becomes fragrant. Here's the thing—don't let the garlic brown, or it'll turn bitter. Watch closely and remove the pan from heat if it starts to darken, then return it to medium heat once cooled slightly.
Sauté the Green Beans
Add the prepared green beans to the skillet in a single layer, tossing gently to coat them evenly in the oil and aromatics. Cook for 4-5 minutes, stirring occasionally, until the beans begin to soften slightly at the edges but still maintain a bright green color and firm texture. You're aiming for just a hint of blistering—not fully cooked yet.
This initial searing builds flavor and prevents the beans from becoming mushy later. If your pan gets too crowded, work in batches to ensure even cooking. The beans should still have a satisfying crunch when you press them between your fingers.
Simmer in Broth and Herbs
Pour in the 1.5 cups low-sodium chicken broth, scraping up any browned bits from the bottom of the pan with a wooden spoon. Add the 0.25 cup chopped fresh thyme leaves, 0.75 tsp salt, and 0.5 tsp ground black pepper. Bring the mixture to a gentle simmer, then reduce heat to medium-low.
Cover the skillet and let the beans simmer for 8-10 minutes, stirring occasionally. You'll know they're nearly done when they're tender but still hold their shape when pierced with a fork. The sauce should thicken slightly but remain loose enough to coat the beans. If the liquid reduces too quickly, add 2-3 tablespoons of water to maintain the desired consistency.
Finish with Cream and Acid
Stir in the 0.25 cup heavy cream and the 1 tbsp lemon juice, along with the 0.25 tsp red pepper flakes if using. Simmer uncovered for an additional 2-3 minutes until the sauce thickens slightly and the flavors meld together. Taste and adjust seasoning with more salt or pepper if needed.
Finish with the 1 tsp fresh lemon zest, tossing gently to distribute it evenly. The zest adds a bright, citrusy note that cuts through the richness of the cream. Remove the skillet from heat and let the beans sit for 2-3 minutes to allow the sauce to fully coat them.
Garnish and Serve
Sprinkle the 0.125 cup chopped fresh parsley leaves over the top just before serving. The parsley adds a fresh, vibrant contrast to the rich sauce. Serve immediately while the beans are still hot and the sauce is at its peak consistency. This dish pairs beautifully with crusty bread or grilled chicken.
Real talk: the beans will continue to soften slightly as they sit, so don't overcook them in the final stages. The sauce should cling to each bean, delivering a harmonious balance of garlic, herbs, and citrus. Enjoy the perfect al dente texture with every bite!
Pro Tips For Making Green Beans In Sauce
- Trim Beans Like a Pro: Cut the ends at a sharp angle—about ¼-inch off each stem—so they sit flat in the pan. I learned this the hard way after watching my beans slide around like drunk spaghetti in a sauce. A quick pass with a sharp knife (not your butter knife) makes all the difference when you’re tossing them later.
- Sweat Shallots Slowly: Cook shallots on medium-low heat until they’re translucent, not browned—about 5 minutes with a pinch of salt. After burning three batches, I finally figured out that rushing this step turns your sauce bitter. Think "soft and sweet," not "crispy and sad."
- Salt the Beans First: Toss raw green beans with ½ teaspoon salt and olive oil before cooking—it seasons them deep and prevents soggy, flavorless strands. I was skeptical until I tried it: the sauce clings better, and the beans stay crisp even after simmering.
- Deglaze with Wine (or Vinegar): After browning garlic and shallots, splash in 2 tablespoons of dry white wine (or apple cider vinegar) to lift the fond from the pan. This isn’t the prettiest method, but it’s the tastiest—your sauce will taste richer without extra effort. (Yes, even if you’re impatient like me.)
Troubleshooting your green beans in sauce
Mushy Beans Fix
If your green beans turn out mushy, it’s almost always from overcooking. The key is timing—simmer them for 8-10 minutes max after adding broth. I’ve found that 1.5 lbs of beans should be tender-crisp when pierced with a fork, not soft like cooked spaghetti.
If you’re worried about undercooking, start checking at 7 minutes and taste-test a piece. 🌱
Sauce Too Thin?
A watery sauce usually means the broth reduced too quickly. To fix this, stir in 1 tbsp cornstarch mixed with 2 tbsp cold water and simmer for 1-2 minutes until thickened. For next time, reduce the broth by ¼ cup or add 0.25 cup heavy cream earlier in the process.
The sauce should coat the back of a spoon but still be pourable.
Garlic Overpowering?
If the garlic flavor feels too strong, balance it with more acid—add 1 extra tbsp lemon juice or a splash of vinegar. For future batches, reduce the garlic to 3 cloves or sauté it for just 1 minute instead of 2.
Fresh thyme also helps mellow the garlic’s intensity. Taste as you go—adjustments make all the difference!
Beans Too Dry?
Dry beans happen when the sauce evaporates too much. Keep the pan covered while simmering and add 2-3 tbsp water or broth if needed. For extra richness, stir in 1 tbsp butter at the end.
The sauce should glisten slightly—if it looks dull, it’s time to add a splash of liquid. 💧
Uneven Cooking?
If some beans are undercooked while others are overdone, it’s likely a crowding issue. Work in two batches if your pan is too full, ensuring even exposure to heat.
A 12-inch skillet is ideal for 1.5 lbs of beans. Stir gently but frequently to prevent sticking, and avoid overfilling the pan—beans need room to breathe.
Sauce Separating?
Separation usually means the cream didn’t fully incorporate. Whisk the sauce vigorously for 30 seconds before adding the cream, and simmer gently afterward. For a smoother texture, temper the cream first by mixing 1 tbsp cold sauce into it before stirring into the pot.
This prevents curdling and keeps the sauce velvety. ✨
Nutrition facts
Frequently asked questions
Can I use frozen green beans instead of fresh?
Yes, but with a few adjustments! Use 1.25 lbs of frozen beans (thawed first) since they're more watery. Add them to the pan after sautéing the aromatics, then simmer uncovered for 5-6 minutes instead of 8-10. Frozen beans release moisture faster, so reduce the broth by 0.25 cup to prevent a watery sauce.
How do I make this vegetarian or vegan?
Swap the chicken broth for vegetable broth and replace the heavy cream with 0.25 cup coconut milk or 0.5 cup cashew cream. For extra richness, add 1 tbsp nutritional yeast at the end. The dish will still be flavorful—just plant-based!
Can I prepare this ahead of time?
This dish tastes even better the next day. Store in an airtight container in the fridge for 4-5 days. The sauce will thicken slightly, and the flavors meld. Reheat gently on the stove with a splash of water or broth to loosen the sauce. For freezing, portion into containers with sauce on top to prevent sogginess—keeps for up to 3 months.
What if I don't have fresh thyme?
No problem! Use 1 tsp dried thyme (one-third the amount of fresh) or substitute with 0.5 tsp dried oregano or 0.25 tsp dried rosemary. For a different herbal note, try 1 tbsp fresh basil at the end. The key is balancing the garlic's intensity with fresh herbs—adjust to taste!
What's the best way to serve this dish?
This versatile side pairs perfectly with grilled meats like chicken or salmon, or serve over jasmine rice for a light main. For extra indulgence, sprinkle with toasted pine nuts or pecans and serve with crusty bread to soak up the sauce. It also works well as a cold salad—chill the dish and garnish with extra lemon zest before serving.