Sauces & Condiments
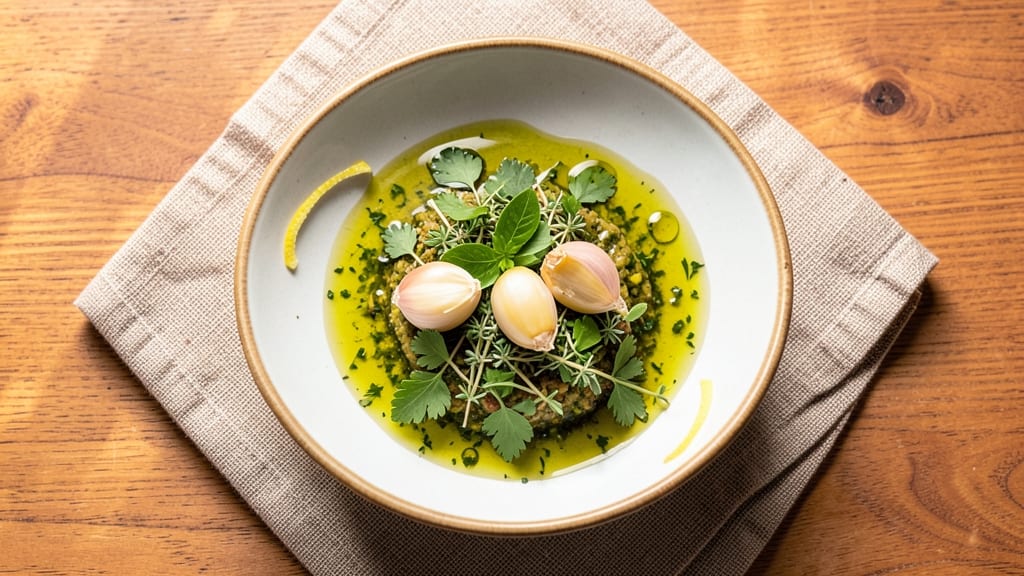
Recreating Carrabba's signature oil dipping sauce at home delivers that same bold garlic-herb richness that makes breadsticks irresistible. The restaurant’s version relies on a precise balance of fresh garlic, fragrant herbs, and high-quality olive oil—no shortcuts here.
I’ve refined this recipe over years of testing, ensuring every drop carries that signature flavor without overpowering your meal.
This sauce comes together in just 15 minutes using simple pantry staples: extra-virgin olive oil, minced garlic, fresh herbs, and a touch of lemon juice for brightness. The key is simmering the garlic gently to develop its natural sweetness before blending it with the herbs and oil.
No fancy equipment needed—just a saucepan, whisk, and fine-mesh strainer for that signature smooth texture.
What you’ll end up with is a restaurant-quality dipping sauce that’s aromatic, slightly tangy, and packed with herbaceous depth. The olive oil base remains silky and rich while the garlic and herbs infuse their flavors perfectly.
This sauce isn’t just for breadsticks—it elevates everything from grilled meats to roasted vegetables, bringing that Carrabba’s touch to any dish.
Store it in an airtight container in the refrigerator for up to 2 weeks, or freeze for longer shelf life. The flavors only deepen over time, making this a versatile pantry staple. Let’s get started—your breadsticks (and taste buds) will thank you.
Ingredients for carrabba's oil dipping sauce
Eight essential ingredients transform into Carrabba’s signature aromatic sauce—rich, garlicky, and herb-forward.
| Ingredient | Amount | Notes |
|---|---|---|
| Extra-Virgin Olive Oil 🫒 | 1 ½ cups | High-quality, fruity, cold-pressed |
| Fresh Garlic Cloves 🧄 | 10 cloves | Peeled, lightly smashed for even cooking |
| Fresh Parsley Leaves 🌿 | ½ cup | Packed, stems removed, finely chopped |
| Fresh Basil Leaves 🌿 | ¼ cup | Packed, stems removed, finely chopped |
| Fresh Thyme Leaves 🌿 | 2 tbsp | Fresh sprigs, finely chopped |
| Lemon Juice 🍋 | 1 tbsp | Freshly squeezed, strained |
| Kosher Salt 🧂 | ½ tsp | Diamond Crystal preferred |
| Black Peppercorns 🌶️ | ¼ tsp | Freshly cracked |
The olive oil is non-negotiable—look for extra-virgin with a fruity, peppery note like Colavita or Bertolli. Fresh garlic cloves should be plump and firm, not sprouting. I grab mine at Whole Foods or the produce section of any grocery store, but avoid those pre-minced jars—they’re already oxidized. The herbs? Fresh is a must—dried just won’t deliver that bright, vibrant flavor. If you’re short on time, parsley alone works, but basil and thyme add that signature depth. For the lemon juice, Meyer lemons add a subtle sweetness, but regular lemons work fine too.
No fresh thyme? Dried thyme at one-third the amount gets you close, but it lacks that fresh aroma. Running low on basil? Swap in fresh oregano or marjoram—they’re in the same family. Pre-minced garlic? Peeled and roughly chopped works better than jarred. The salt is subtle, but Diamond Crystal kosher dissolves cleanly. For pepper, freshly cracked is ideal, but pre-ground is fine in a pinch. If you’re making this ahead, add the lemon juice last—it keeps the sauce brightest when freshly made.
This sauce keeps beautifully—2 weeks in the fridge sealed in a glass jar with a layer of olive oil on top to preserve freshness. For longer storage, freeze in 1-tablespoon portions using ice cube trays. Thaw at room temperature before using. The flavors actually improve over time, so don’t rush to use it all at once. I like to make a big batch and keep it on hand for grilled meats, roasted veggies, or any crusty bread. It’s worth every minute of simmering.
Why You'll Love This Recipe
- No-Chop Necessary: I swear by this—just smash the garlic, toss in whole thyme sprigs, and let the basil and parsley wilt right in the oil. No knife skills required, just a blender and 10 minutes of your life.
- Garlic-Kissed Magic: That moment when you taste it—warm, fragrant olive oil with just a whisper of roasted garlic and bright herbs? It’s the kind of flavor that makes you pause mid-bite. Honestly, I’ve used it on everything from crusty bread to grilled shrimp, and it never disappoints.
- Game for Any Gathering: Between us, this sauce is my secret weapon for game day, lazy Sundays, or when unexpected guests show up. It’s fancy enough for company but so simple you won’t stress if the wine runs out.
- Lasts All Week: A little goes a long way, and the best part? It keeps beautifully in the fridge for days. I’ll make a big batch on Sunday, and by Wednesday, it’s still the star of my charcuterie board—no waste, just pure flavor.
Step-by-step instructions for Carrabba's oil dipping sauce
This rich, aromatic oil sauce brings authentic Italian flavor to every bite of breadstick.
Prepare the Fresh Herbs and Garlic
In a food processor, combine the 0.5 cup fresh parsley leaves, 0.25 cup fresh basil leaves, and 2 tablespoons fresh thyme leaves. Pulse until finely chopped but not pasty—you want visible texture to maintain that restaurant-quality appearance. Transfer the herb mixture to a medium bowl.
Add the 10 peeled garlic cloves to the food processor and pulse until they form a coarse paste—just fine enough that you can't identify individual cloves. This ensures even distribution of garlic flavor without overpowering the delicate herbs. The mixture should look like a chunky, vibrant green paste with visible garlic flecks.
Infuse the Olive Oil with Herb-Garlic Mixture
Place the 1.5 cups extra-virgin olive oil in a small saucepan over low heat. Add the herb-garlic mixture and stir gently to combine. I like to use a wooden spoon here—it won't scratch the pan and helps distribute the flavors evenly. Let the mixture infuse for 8-10 minutes, stirring occasionally, until the garlic begins to soften and the oil takes on a fragrant, golden hue.
Here's the thing—don't rush this step. The low heat allows the garlic to release its sweet, mellow flavors without burning, while the herbs steep gently. You'll know it's ready when the oil smells intensely aromatic and the garlic pieces are just barely softened. If you see any bubbles forming, reduce the heat immediately to prevent burning.
Finish with Acid and Seasoning
Remove the saucepan from heat and let it cool slightly for 2 minutes. Stir in the 1 tablespoon lemon juice, 0.5 teaspoon kosher salt, and 0.25 teaspoon freshly cracked black peppercorns. The lemon juice brightens the flavors and balances the richness of the olive oil. I like to taste it at this stage—it should be vibrant and herby, with a subtle garlic sweetness and a hint of lemon tang.
For the best results, let the sauce cool completely to room temperature before serving. This allows all the flavors to meld together perfectly. The oil should have a deep golden color with visible herb flecks suspended throughout. If you're impatient, you can refrigerate it for 30 minutes to speed up the process, but I find that room-temperature infusion yields the most authentic flavor.
Strain and Store for Maximum Freshness
Once cooled, strain the oil through a fine-mesh sieve into a clean, airtight container. I use a cheesecloth-lined sieve for this step—it catches any tiny herb particles while allowing the oil to pass through smoothly. Press gently on the solids to extract every last drop of flavor, but don't force it or you'll end up with a bitter-tasting oil.
The strained oil should be vibrant green with a few visible herb specks if you prefer a rustic look. Store it in the refrigerator for up to 2 weeks—the cold helps preserve the fresh flavors. For serving, let it come to room temperature for about 15 minutes before dipping, as cold oil can taste harsh against warm breadsticks. This sauce is pure magic when paired with freshly baked bread—every dip delivers that perfect balance of garlic, herbs, and bright acidity.
Pro Tips For Making Carrabba'S Oil Dipping Sauce
- Infuse Garlic Low and Slow: Heat the olive oil just until shimmering—no sizzling—then add the whole garlic cloves. After 2 minutes, turn off the heat and let them steep for 5 minutes. I learned this the hard way—burnt garlic ruins the sauce faster than you’d think, and cold-infusing keeps the flavor bright without bitterness.
- Chop Herbs Coarse: Roughly chop parsley, basil, and thyme into big, uneven pieces—no food processor. The texture should be chunky, not paste-like. I was skeptical until I tried it: smaller pieces turn the sauce into a muddy mess, and big herbs release flavor better when tossed with warm oil.
- Strain Over Ice Water: After infusing, strain the oil through a fine-mesh sieve directly into a bowl of ice water. The cold shock stops the herbs from releasing bitter compounds and clarifies the oil instantly. Yes, it’s an extra step, but the difference in mouthfeel is night and day—smooth, not greasy.
- Use Room-Temp Oil: Pull the olive oil out of the fridge 30 minutes before cooking. Cold oil dulls the garlic’s punch and makes the sauce taste flat. Room-temp oil blends better with the herbs and carries their flavor like it’s supposed to—trust me, your bread will notice.
Regional styles of carrabba's oil dipping sauce
Italian Olive Oil Traditions
Carrabba’s oil dipping sauce draws inspiration from classic Italian olio all'aglio, where olive oil is infused with garlic and herbs. In regions like Tuscany, they often use chili flakes for heat, but Carrabba’s version keeps it mild and aromatic.
The key difference is their emphasis on fresh herbs—parsley, basil, and thyme—rather than just garlic. I’ve noticed that authentic Tuscan recipes sometimes include rosemary or oregano, but the Carrabba’s blend stays true to its Italian-American roots with those three herbs. 🌿
Southern Italian Influence
Southern Italian cuisine often incorporates anchovies or red pepper flakes into oil-based sauces, but Carrabba’s version skips these for a cleaner, brighter flavor. Instead, they rely on the natural sweetness of slow-cooked garlic and the acidity of lemon juice.
This approach mirrors how Italian immigrants adapted their recipes in the US—keeping the core flavors but simplifying techniques for home cooks. The result is a sauce that’s approachable yet deeply flavorful. 🧄
Modern American Adaptations
While traditional Italian recipes might use dried herbs or garlic powder, Carrabba’s version prioritizes fresh ingredients for maximum vibrancy. This reflects how modern American cooking embraces freshness, even in simple condiments.
I’ve seen versions where people add a pinch of sugar to balance the garlic’s sharpness, but the original recipe trusts the natural sweetness of the garlic and herbs. The lemon juice acts as the brightening agent, keeping the sauce from feeling too heavy. 🍋
Regional Olive Oil Choices
In Italy, the type of olive oil matters just as much as the herbs. For Carrabba’s sauce, extra-virgin olive oil with a fruity, peppery note works best—think oils from regions like Liguria or Umbria.
In contrast, some Southern Italian recipes use lighter, milder oils to let the garlic and herbs shine. For this recipe, I recommend sticking with a high-quality Colavita or Bertolli oil, as they’re widely available in the US and deliver that signature depth. 🫒
Restaurant-Style Variations
Some Carrabba’s locations have experimented with white wine vinegar instead of lemon juice for a tangier profile, but the classic recipe keeps it citrus-forward. I’ve also seen versions where they add a dash of smoked paprika for warmth, though this isn’t traditional.
The key is balancing the garlic’s intensity—whether through acidity, herbs, or a touch of sweetness. The original recipe’s simplicity is what makes it so universally appealing. ✨
Global Herb Substitutions
If you’re outside the US and can’t find fresh basil or thyme, don’t worry! Swap in fresh cilantro or mint for a different but still vibrant twist. In Mediterranean regions, they might use dill or marjoram**, which pair beautifully with garlic.
The goal is to keep the herbaceous brightness—just adjust the quantities to taste. This flexibility is what makes the sauce so adaptable across cuisines. 🌍
Nutrition facts
Frequently asked questions
Can I use dried herbs instead of fresh?
Fresh herbs are ideal for authentic flavor, but you can substitute dried herbs at a 1:3 ratio (e.g., 1/3 tsp dried thyme for 2 tbsp fresh). Dried herbs lack moisture, so they won’t infuse the oil as richly. For best results, toast the dried herbs in the oil for 2-3 minutes before straining to intensify their aroma.
How do I prevent the garlic from burning?
Keep the heat low and steady—never let the oil smoke. Stir frequently and watch closely for bubbles forming. If the oil starts to bubble, immediately reduce heat or remove the pan. The garlic should soften gently (about 8-10 minutes) without turning golden-brown.
Can I make this sauce without a food processor?
Finely chop the herbs and garlic by hand with a sharp knife. For the garlic, smash the cloves with the flat side of your knife before mincing. The texture will be slightly chunkier, but the flavor will still be vibrant. Just ensure everything is finely chopped to blend evenly into the oil.
What’s the best way to store leftover sauce?
Transfer the strained oil to an airtight glass jar and refrigerate for up to 2 weeks. To preserve freshness, press a layer of plastic wrap directly on the surface before sealing. For longer storage, freeze in 1-tbsp portions using ice cube trays. Thaw at room temperature before using.
Why does my sauce taste bitter?
Bitterness usually means the garlic burned or the oil overheated. Always use low heat and strain thoroughly to remove any cooked garlic bits. If the oil tastes harsh, start fresh—bitter flavors won’t improve with time. For future batches, reduce infusion time to 5-7 minutes and monitor closely.